Searching for a specific blog post? Try here:

Jiao zi with leftover duck

I have no idea if these count as actual jiaozi (which are a form of Chinese dumpling). I am calling them jiaozi because the pre-made dumpling wrappers we had in the freezer were wheat-based dumpling wrappers from some Asian grocery store (not sure which one, they have been in that freezer for years…) I combined:

Leftover smoked duck meat (shredded and finely chopped)

A splash of soy sauce, a sprinkle of brown sugar, and a few grinds of pepper

and mixed this with a coconut-oil sauteed mixture of:

Shredded and chopped green cabbage

Finely chopped button mushroom stems

and a few sprinkles of powdered ginger and powdered garlic.

I mixed in a couple tablespoons of cornstarch (dissolved in water) to try to make sure the mixture would stick together and not fall out of the dumplings if they came open in cooking. They didn’t, so I’m not sure the cornstarch was needed, but if it was, it worked. Then I wrapped the mixture in the afore-mentioned dumpling wrappers. These are the kind where you rub a wet finger along the edge and then pinch the sides together to seal the dumpling closed.

I cooked the jiaozi like potstickers: in a cast iron skillet on high heat I first fried them briefly in beef tallow; then I added about a cup of water and a not-very-tight-fitting lid and let them steam until the water was gone. I tried cooking them in coconut oil as well but we agreed the beef tallow was better (though coconut oil smells better when you’re cooking.)

Those are five-year-old fingers reaching for one in the photo above, so yes, they were good.

Whole duck on the Pit Barrel Cooker

I have struggled to cook a whole duck successfully. First I tried a modified version of Julia Child’s recipe: modified in that I cooked the duck the way she described, but I didn’t do all the other fiddly stuff on the side like taking the membrane off orange slices. In my opinion, having tried several other Julia Child recipes in the past, either Julia Child never actually cooked anything, or whoever wrote her cookbooks got the recipes wrong. Julia’s duck was a disaster, and in hindsight her instructions had us cooking the duck for a stupidly long time and at insane temperatures.

This time I tried cooking/smoking the duck on/in our pit barrel cooker. We have used a Pit Barrel Cooker* for years; it’s not perfect but I like it. This is not a recommendation, because I don’t know what you like, but I’m happy with it.

I rubbed the duck in oil and a spice rub, fired up the charcoal, and hung the duck from the rebar. It was supposed to take 3 hours. After 2 hours the breast meat was registering 190 degrees (it’s supposed to be 140) and the skin was very nicely browned. However, I found that there was still a pretty thick layer of fat under the skin. This is supposed to render out at the initially high cooking temperature, which clearly didn’t happen. I put the duck under the broiler for 5 minutes or so which successfully rendered the fat and crisped up the skin.

Despite being technically overcooked, this duck turned out really well. The meat was certainly not tough and chewy but was instead relatively tender and flavorful, the skin was (reasonably) crispy, and overall it was a very good experience. In the future I will probably try starting the duck under the broiler first, to get the fat bubbling, and then hanging it in the pit barrel cooker to finish — and watching the temperature more closely.


* A pit barrel cooker (whether sold by the company of that name or from some other source) is basically a steel barrel with air holes in it and a lid. You light a charcoal fire in the bottom and hang meat on hooks from a piece of rebar across the top. The idea is that as the fat from your meat drips on the charcoal, it makes smoke: not wood smoke like in an actual smoker, but enough so you get at least some smoky flavor. Meanwhile the meat cooks through convection as heat rises from the charcoal.

Grilled lamb tails and testicles

It’s time to separate the boys from the…

Yes, you read that correctly. They were delicious by the way.

From our processor the lamb testicles come with a membrane still on. I cut off any weird looking tube parts which you might remember from anatomy class. Removing the membrane requires you to stick your fingers underneath there and loosen it, then you pull it off.

I brined the de-membraned, cleaned up testicles for about 24 hours in a sweet brine, with salt, brown sugar, and some spices. Then I cut them in half length-wise. I think cutting them in half was unnecessary: they cooked fast enough and it made them very messy on the grill. I put them on skewers, then I grilled them on a pre-heated grill over direct heat for probably about 10 minutes, flipping once. Eat them warm, fresh off the grill.

Just…try not to think about it, guys.

Grilled lamb testicles

I simmered the lamb tails in salted water with a copious amount of fresh rosemary for at least an hour. They were pretty tender when I took them out. Then I let them dry off on a rack in the refrigerator overnight. I coated them with a sweet barbecue sauce (not homemade) and grilled them on medium heat until they started getting blackened and crispy edges.

These were big, sweet, juicy balls, and the smooth, creamy texture felt really good in my mouth.

I also made lamb tails based on an Afrikaaner dish called Skaapstertjies. I copied that word from the Internet, to be honest, I didn’t spell it myself. The lamb tails were nice and tender but mostly a vehicle for sauce.

Tails simmered for tenderness

The tails were popular, mostly as a vehicle for barbecue sauce. There isn’t much meat on them, and you do need to simmer them for at least an hour and possibly longer; the grill time is just for flavor. Worth it if you can cook a lot of them all at once. That’s my tale, anyways.

Chicken and Dumplings

We’ll all have chicken and dumplings when she comes…

Materials

One or two whole pasture-raised chickens. Giblets optional.

A large pot

Onion, carrot, celery (amount depends on what flavor you want)

Salt, whole peppercorns, herbs de Provence or some other mixture of herbs including thyme and marjoram. (Or…not, if you don’t like thyme and marjoram with chicken. You do what you want.) A few bay leaves, and or some dried mushrooms or mushroom powder would go well. Maybe soy sauce? Something for umami flavor is the idea.

Other vegetables (canned or frozen corn or peas work well)

Dumplings (see below)

Optional: grass-fed butter, green onion, parsley

Method

Put the chicken(s) in the pot and cover it with plenty of water. Simmer the chicken for several hours. A lid helps. Do not boil the chicken, this can make it tough.

Remove the chicken from the pot. Reserve the broth (which you have just made) in the pot. Let the chicken cool.

Vegetables and Broth. (Heirloom carrots, some are yellow.)

Chop onion, carrot, and celery and add to the pot with the broth. Add salt. Add a small handful of peppercorns. Add herbs or herb mix. Add bay leaves. Turn up the heat to a slow boil.

Shredded Chicken separated from bones

When the chicken is cool enough to handle, pull off the meat. Discard the bones, and the skin unless you want to eat it; optionally, save the largest, thickest bones.

Taste the broth, add salt if needed. Optionally, add the largest chicken bones back to the stock for more flavor. (You will need to remove these eventually.) Continue boiling the soup for 10-15 minutes, then reduce to a simmer.

When the carrot and celery are soft, add back in the chicken meat and any extra vegetables. We like to use sweet corn. You can cut the kernels off the cob when corn is in season and freeze it for use over the winter.

A chicken in every pot

Taste for seasoning one last time. Optionally, add in a few tablespoons of butter.

Drop dumpling batter, mixed

Add the dumplings. There are a lot of different dumpling recipes. You can use a biscuit mix from the store, you can make spaetzle, you have a lot of options. A simple drop dumpling recipe is as follows: Combine 2 cups of flour, 2 teaspoons baking powder, 1/2 teaspoon baking soda, 2 teaspoons sugar, salt, and seasonings (we use a seasoning salt). Mix together 1 cup of whole milk, a few tablespoons of melted butter, and a dash of apple cider vinegar. Fold the wet ingredients into the dry. Don’t overmix. Make sure the soup is simmering enough to create steam. Use 2 spoons to drop (thus the name) large spoonfuls of dumpling batter onto the top of the soup. Cover with a lid and simmer the dumplings 15 minutes.

Serve the dumplings right away, or they’ll begin to disintegrate into the soup (not the end of the world). Consider garnishing with green onion and fresh parsley.

Modified Mutton "Biryani"

This is a sort-of approximation of a real biryani which is modified for cooks who are lazy time sensitive and who don’t necessarily have all of the ingredients on hand for a traditional biryani.

What is “Mutton”?

While the definitions change depending on where you are, in general “mutton” refers to meat from a sheep that is 2 years of age or older, meaning it has gone through at least one breeding cycle. “Lamb” is generally from a sheep that is around a year old or younger, and does not yet have its permanent incisors. The term for a sheep that is mature but between 1 and 2 years of age (and thus has likely not been through a breeding cycle) is a “hogget”. There is a very wide variation in grass-fed lamb or mutton, based on whether the animal was standing in lush pastures eating a salad bar of grasses and hay, or whether it was walking miles each day over scrub land looking for grass to eat. Neither of these methods of raising sheep is “better”, but if you’ve only tried range-raised lamb (or mutton) and it wasn’t to your taste, try some lamb from a local farmer who sees the animals every day instead of turning them loose on open range for the season.

Source: Anchor Ranch Farm

Materials

2 pounds of boneless mutton stew meat

2 cups of basmati rice

2-4 yellow or sweet onions (depending on size), sliced thin

plain yogurt, or milk

lemon juice

powdered or fresh ginger

minced garlic or garlic powder (not salt!)

butter

Ghee or lard (real lard, not the packaged stuff full of preservatives)

fresh cilantro, chopped

spices: salt, black pepper, nutmeg, mace (or more nutmeg), dried or fresh mint, cinnamon (stick and ground), cloves (whole), cardamom (pod or ground), ground cumin, ground coriander, bay leaves, turmeric.

You need the salt, nutmeg, cardamom of some form, and cinnamon. Cloves are a nice to have. For the rest, if you have to you could substitute a basic curry powder. Make sure your curry powder is salt-free or make sure you balance the curry and any extra salt you add. If you happen to have garam masala, use that.

A big heavy pot with a lid

Aluminum foil

Another pot

Optional: dried raisins or craisins, nuts, prunes, something like that

Method

Marinade the Mutton

First, marinate the mutton in plain yogurt mixed with ginger and garlic powder for a few hours, or overnight if you can. If you don’t have plain yogurt, make a mix of milk (we always use local raw milk), a couple tablespoons of lemon juice, some salt, and powdered ginger and garlic, just enough to cover all of the mutton. You could grate fresh ginger instead of the powder, if you have it, and you could use minced fresh or dried garlic. Here is a photo of the mutton in the marinade:

Carmelize the Onions

Put some lard (or ghee) in the bottom of your big heavy pot and put it on medium heat. Add salt and the sliced onion and carmelize, stirring occasionally. How much salt depends on what you want it to taste like. The browner the onions get, the more flavor they will have, but the closer you get to burning them. If you have other things to do besides watch onions cook, just go until they have some brown bits in them, like the photo below.

Once the onions are sufficiently carmelized, add one cinnamon stick, a few cloves, dried or fresh mint (if you have it), 3-5 cardamom pods or a few pinches of ground cardamom, 2-3 bay leaves (if you have them), a few pinches of mace (if you have it, otherwise use extra nutmeg), and either a garam masala mix OR about half a nutmeg (ground), ground black pepper, several shakes of ground cumin and of ground coriander, and several shakes of cinnamon. If you want, add a bit of chili powder. Turn up the heat and cook and stir the onions with the spices for about another minute. The most important flavors here are the carmelized onion, the cardamom, nutmeg or mace, cumin, coriander, cinnamon, and cloves. I don’t like giving spice measurements because it depends on how strong you like the flavors and how old your spices are. Try roughly equal parts cumin and coriander, slightly more than that of cinnamon, even more than that of cardamom, and a whole heck of a lot of nutmeg, maybe 50:50 with mace if you have it. As mentioned, you could substitute out some of these for a curry powder mix if that is all you have, just read the ingredients.

Simmer the Mutton Until Tender

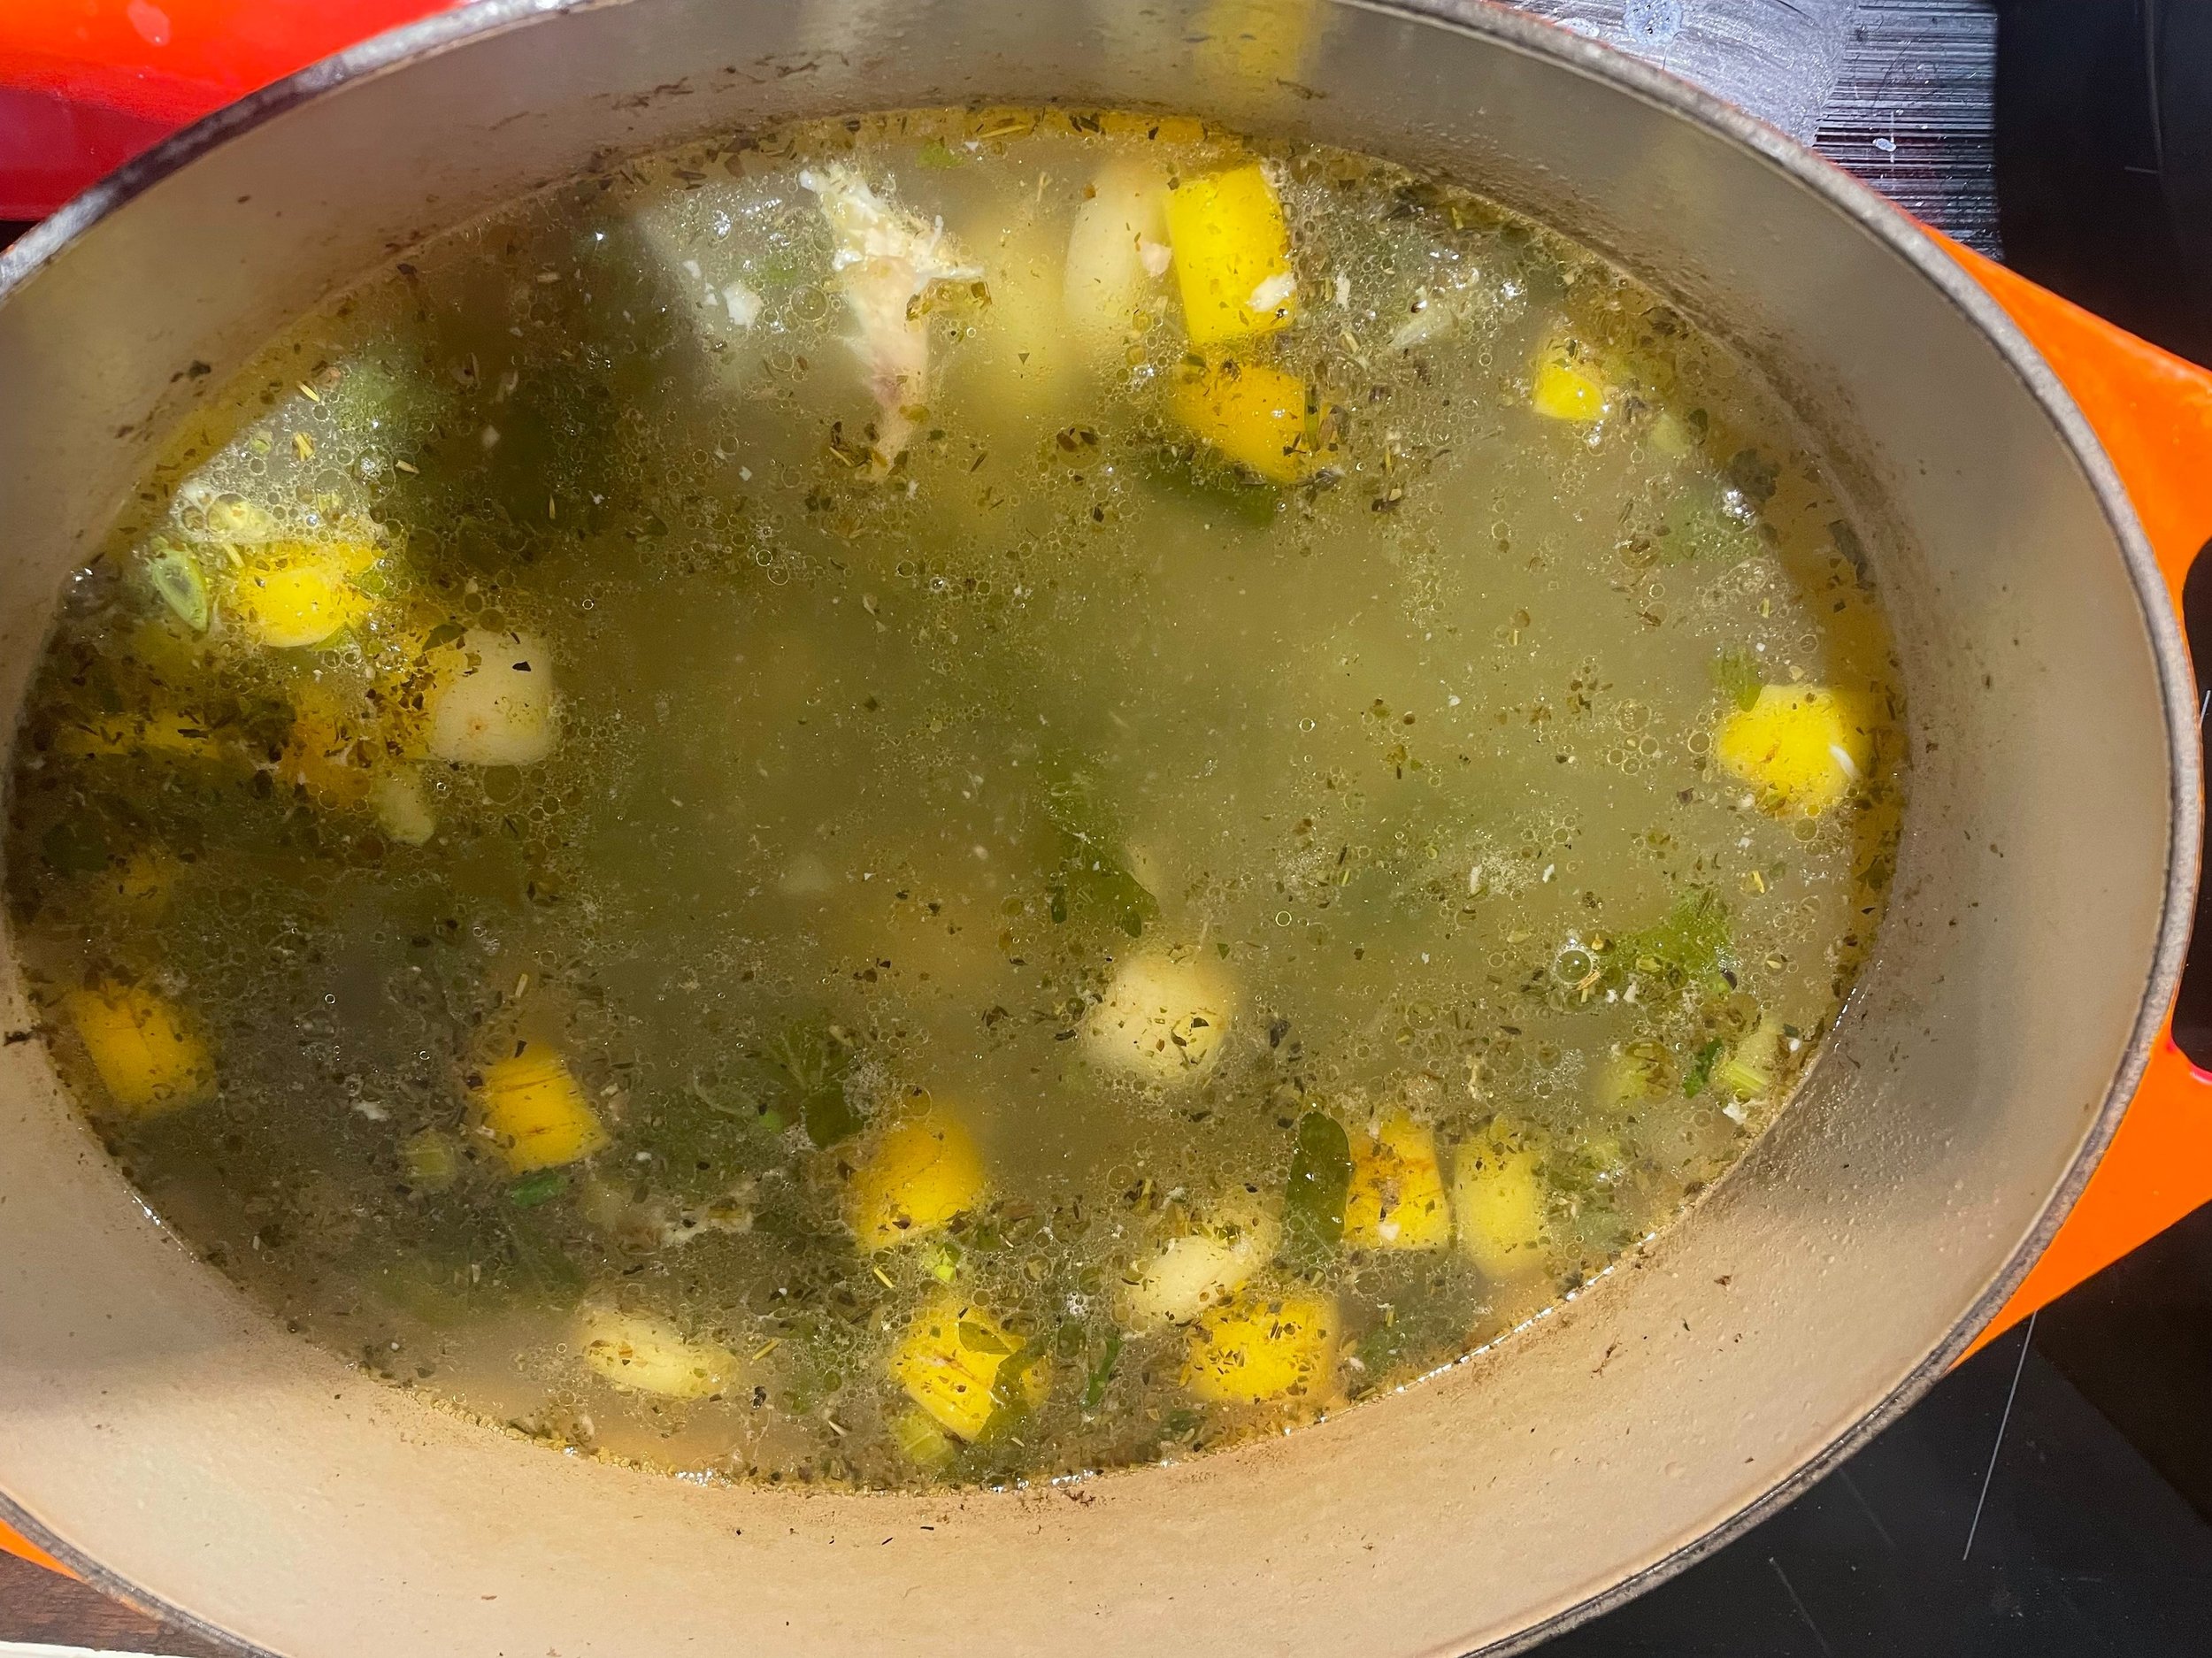
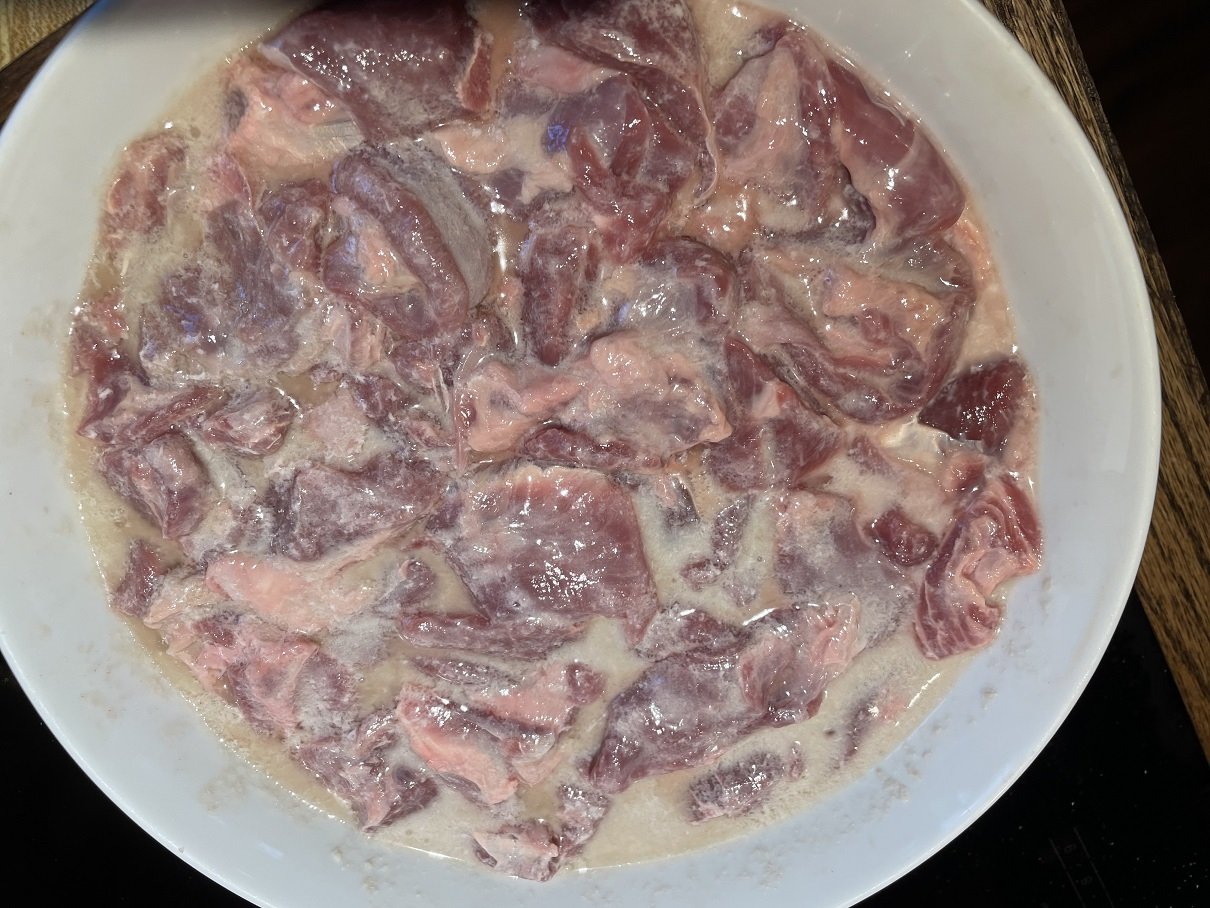
Add in the mutton along with its marinade. Add chopped cilantro, or parsley if you don’t like cilantro, or some other green herb that reminds you of cilantro or parsley (we used papalo). Stir everything to combine. Add about 2 cups of water and bring to a boil. Add extra salt to taste. I like to add chicken bouillon, not really for the weird stuff and the chicken flavor but for the MSG. I know, OMG, I thought you were about natural food, MSG is extracted from….seaweed, and L-glutamic acid is in a whole bunch of different kinds of natural foods. Hey, you do you, leave it out if you don’t like it. If you cooked the onions in lard and not ghee, consider adding a couple tablespoons of butter, for flavor. If you cooked the onions in some kind of hydrogenated vegetable oil, pack up your backpack and go to the principal’s office right now.

Turn the heat down, put the lid on, and simmer the mutton for several hours, stirring occasionally until it is tender. The cooking liquid should be bubbling but not popping boiling hot bubbles in your face. When done, you should be able to cut a piece of mutton in half with a wooden spatula. If the meat is not that tender, keep cooking, and add more liquid if necessary.

Prep the Rice

Meanwhile, rinse your rice (most rice has arsenic in it — which is probably not a big deal if you have a healthy immune system and you rinse it), then soak the rice in a pot of water, at least twice as much water as rice. (You can change out the water before cooking if you’re that kind of person.) When the mutton is close to tender, add to the rice pot a few tablespoons of butter, a pinch of salt (if to your taste), a jigger of lemon juice, some extra cardamom (pods or ground), and a healthy dose of turmeric. You can do without the turmeric if you want, it’s mostly to color the rice yellow, because saffron is really, really, really expensive. Bring the rice mixture to a rolling boil for just 2 minutes. Drain the rice (a mesh strainer is helpful but not strictly necessary.) Yes, you are wasting most of the flavorings since you only boiled the rice for 2 minutes. You could save the liquid and use it later as a base to cook another batch of rice.

Finish the Mutton, Steam the Rice

Take the lid off the mutton and crank up the heat, stirring while you reduce the cooking liquid until it’s still there but you can see the mutton above the top of the liquid. It’s better to err on the side of a little extra broth so you make sure there is enough liquid to finish steaming the rice. Then reduce the heat to low. Spread the parboiled rice evenly over the top of the mutton. Decorate (optionally) by sprinkling something like dried cranberries over the top.

Cover the cooking pot tightly. One way to do this is to seal it with aluminum foil and then put the lid on top of that. Steam the rice like this for around 30 minutes before checking to see if the rice is done.

Make a Raita

When the rice is steamed the biryani is done. It is best served with some kind of a raita, such as plain yogurt mixed with minced cucumber and chopped, fresh mint. By which I mean, ignore complicated raita recipes and chop up half a cucumber and a handful of mint, then mix it into a cup or so of plain yogurt.

Remember to take out the bay leaves and whole spices or at least warn people to watch out for them. Or don’t.

Source: Anchor Ranch Farm

You Can Make Your Own Sausage (Swedish Potato Sausage)

I don’t have any pictures of how the sausage is made. Sorry.

You are probably going to get more consistently good flavor and texture if you pay a professional butcher to make sausage for you. However, making your own sausage at home is really easy, you can control exactly what goes into it, and there are way more varieties of sausage you can try than you could possibly find at a butcher shop.

For this past Christmas (I know, it’s May) we made Swedish Potato Sausage. We normally try to make something from our families’ heritage for Christmastime, so a year or so ago it was Sauerbraten (which was…weird. Okay, but weird. Sorry Deutschlanders.) This past year it was Swedish Potato Sausage.

The recipe for Swedish Potato Sausage is basically equal parts by weight of pork and potato, a few onions, salt, pepper, allspice, and some milk to help stick it together. Then stuff it in pig intestine.

Unfortunately it appears to be impossible for small scale meat processors that serve small, local farms to reserve the hog intestines, so unless you slaughter your own animal and are able to save and clean the intestines, you will probably have to buy natural casings. You can find them occasionally in gourmet stores or order them online. They come in a vacuum-packed bag with a whole lot of salt. They'll keep for several months in the refrigerator, usually. When you open the bag, it smells like, well, pig intestines. You need to rinse them A LOT in cold water including running cold water through them, and then they shouldn’t smell. This also removes most of that salt.

If you don’t want to use natural hog casings there are other varieties available, including collagen casings. You need to make sure you read what size casing you are buying: they go by diameter. Don’t mistakenly order the thin-diameter casings for breakfast links if you want to make brats. The casings don’t really stretch; if you fill them up too much, they burst, and then you have to start over.

The Mahabharata of homemade sausage making is probably “Great Sausage Recipes and Meat Curing”, by Rytek Kutas, founder of The Sausage Maker in Buffalo, NY. You can buy it directly from them, and you should, because guys who write a book about how to make sausage are cool. It’s mostly technique though, and kind of short on recipes compared to how stuffed the Internet is with every imaginable kind of sausage recipe.

A meat grinder attachment for a stand mixer is pretty useful. You can often find this kind of thing used, or “refurbished”, and let’s face it, a 10 year old mixer or mixer attachment is possibly better made and going to last longer than one made currently. However, you clearly don’t need all this, since people have been stuffing sausage with just a funnel for, well, forever. The benefit of a meat grinder / sausage stuffer is that grinding your ingredients together mixes them for you, so you get better consistency and not, say, a chunk of one thing followed by a chunk of something else. You could, however, grind in a food processor, or just chop everything with a sharp knife or two.

Anyways, making your own sausage at home is one of those things that is so easy, it’s weirdly sinister that more people don’t do it. If you want to make smoked/cured sausage you still need a way to smoke it, you still need to add nitrite, and you need to know what you’re doing there so you don’t get botulism. If making normal, uncooked sausage, you should plan to make 10 or 20 pounds at a time and then freeze it; there’s not much point in making only enough for a single meal. You are likely going to make a bit of a mess in the kitchen, probably, and prepping and stuffing 20 pounds of sausage takes a few hours. However, there are sausage recipes for everything in your freezer that you don’t know what to do with. Will your kids eat beef cheeks? Maybe. How about kidneys? How about beef cheeks, kidneys, and crusty stale old bread you’ve been storing in the freezer, mixed with sage, nutmeg, and a few other seasonings, and stuffed into a sausage? There you go.

Easy Not-Made-From-Scratch Meat Buns

You can of course make the dough used in these from scratch. However, we must not allow the perfect to be the enemy of the good. Only God is perfect; if you, dear reader, are not a Divine being, you must accept that “good enough” is the best you can do, most of the time. Given the choice between making these meat pies at home and buying something from the frozen aisle, this recipe is quick and easy and at least more natural and healthier than the frozen option.

This is loosely based on a recipe showed me many years ago by a kind lady from Vietnam.

You need:

1 cylinder/package/container of your choice of pre-made biscuit or croissant dough

A handful of fresh mushrooms (your choice, but standard cremini work fine)

One small shallot (or a small piece of onion)

A couple tablespoons of butter

1/4 pound of ground pork

Fennel seed, rosemary, salt, black pepper, sage, marjoram (or thyme)

Brown sugar

Green peas (canned is fine, or use a substitute)

A skillet

A baking sheet and oven

To make the meat pies:

Dice the mushrooms and the shallot - chop it finely, or as much as you feel like working.

Put the butter in a skillet on low-medium heat and add the mushrooms and shallot. Cook slowly until the shallot is translucent and the mushrooms are cooked down and browned.

Add the ground pork and a good pinch of salt. Turn up the heat to medium-high and cook until the pork is mostly cooked through, stirring to mix. Break up the pork as small as possible. If you have one, try using a potato masher to break up the chunks of ground pork.

When the pork is mostly cooked but not browned, add the herbs and black pepper. The mix is equal amounts crumbled sage and crushed fennel seed; add more of either if you want a stronger flavor. Add a pinch of rosemary or to taste, the same with marjoram or thyme. You could substitute crushed red pepper flakes for black pepper if you prefer some added spice. Stir well while the mix continues to cook for a few more minutes and the pork starts browning. Taste, add more salt if needed, then turn off the heat and add brown sugar to taste, maybe a spoonful. Mix well. Taste, add however many peas you want and mix again. (Any other soft green vegetable also works. Leftover cooked greens would be a great substitute for peas.)

Let the mix cool until you can work with it.

Meanwhile, prep your pre-made dough per the instructions on the package. Once you have each piece separated and on the baking sheet, cut or pull it apart down the equator. Put a tablespoonful of your pork mixture in the middle of the bottom half, put the top half of dough over it, and crimp the edges together using the tines of a fork. Or your fingernail.

Bake as directed on the package. Enjoy the meat pies hot or cold.