Searching for a specific blog post? Try here:

Whole duck on the Pit Barrel Cooker

I have struggled to cook a whole duck successfully. First I tried a modified version of Julia Child’s recipe: modified in that I cooked the duck the way she described, but I didn’t do all the other fiddly stuff on the side like taking the membrane off orange slices. In my opinion, having tried several other Julia Child recipes in the past, either Julia Child never actually cooked anything, or whoever wrote her cookbooks got the recipes wrong. Julia’s duck was a disaster, and in hindsight her instructions had us cooking the duck for a stupidly long time and at insane temperatures.

This time I tried cooking/smoking the duck on/in our pit barrel cooker. We have used a Pit Barrel Cooker* for years; it’s not perfect but I like it. This is not a recommendation, because I don’t know what you like, but I’m happy with it.

I rubbed the duck in oil and a spice rub, fired up the charcoal, and hung the duck from the rebar. It was supposed to take 3 hours. After 2 hours the breast meat was registering 190 degrees (it’s supposed to be 140) and the skin was very nicely browned. However, I found that there was still a pretty thick layer of fat under the skin. This is supposed to render out at the initially high cooking temperature, which clearly didn’t happen. I put the duck under the broiler for 5 minutes or so which successfully rendered the fat and crisped up the skin.

Despite being technically overcooked, this duck turned out really well. The meat was certainly not tough and chewy but was instead relatively tender and flavorful, the skin was (reasonably) crispy, and overall it was a very good experience. In the future I will probably try starting the duck under the broiler first, to get the fat bubbling, and then hanging it in the pit barrel cooker to finish — and watching the temperature more closely.


* A pit barrel cooker (whether sold by the company of that name or from some other source) is basically a steel barrel with air holes in it and a lid. You light a charcoal fire in the bottom and hang meat on hooks from a piece of rebar across the top. The idea is that as the fat from your meat drips on the charcoal, it makes smoke: not wood smoke like in an actual smoker, but enough so you get at least some smoky flavor. Meanwhile the meat cooks through convection as heat rises from the charcoal.

Grilled lamb tails and testicles

It’s time to separate the boys from the…

Yes, you read that correctly. They were delicious by the way.

From our processor the lamb testicles come with a membrane still on. I cut off any weird looking tube parts which you might remember from anatomy class. Removing the membrane requires you to stick your fingers underneath there and loosen it, then you pull it off.

I brined the de-membraned, cleaned up testicles for about 24 hours in a sweet brine, with salt, brown sugar, and some spices. Then I cut them in half length-wise. I think cutting them in half was unnecessary: they cooked fast enough and it made them very messy on the grill. I put them on skewers, then I grilled them on a pre-heated grill over direct heat for probably about 10 minutes, flipping once. Eat them warm, fresh off the grill.

Just…try not to think about it, guys.

Grilled lamb testicles

I simmered the lamb tails in salted water with a copious amount of fresh rosemary for at least an hour. They were pretty tender when I took them out. Then I let them dry off on a rack in the refrigerator overnight. I coated them with a sweet barbecue sauce (not homemade) and grilled them on medium heat until they started getting blackened and crispy edges.

These were big, sweet, juicy balls, and the smooth, creamy texture felt really good in my mouth.

I also made lamb tails based on an Afrikaaner dish called Skaapstertjies. I copied that word from the Internet, to be honest, I didn’t spell it myself. The lamb tails were nice and tender but mostly a vehicle for sauce.

Tails simmered for tenderness

The tails were popular, mostly as a vehicle for barbecue sauce. There isn’t much meat on them, and you do need to simmer them for at least an hour and possibly longer; the grill time is just for flavor. Worth it if you can cook a lot of them all at once. That’s my tale, anyways.

Grilled Sweet-Glazed Pork Belly

Source: Anchor Ranch Farm

Pork belly is an under-appreciated cut of meat in the United States because of the increased popularity of bacon since the social buzz campaigns of the Noughties. I blame Muscles Glasses.

I mean, bacon is wonderful, but so is the uncured pork belly. Also, you can make bacon out of a lot more than just pork belly. Shoulder bacon is, I think, for example, a better choice for bacon, lettuce, and tomato sandwiches.

Pork belly is more popular in Asian cuisine and we have featured several ideas from Asian-style cooking for how to prepare pork belly, including Red-Braised Pork Belly (Dong Po Rou) and Chashu Pork Belly. However, those are relatively complex recipes which require a lot of time in the oven. This is a faster (somewhat) version that uses a grill.

Materials

1 pork belly roast, skin off (skin on roasts are better used for some other method)

Soy sauce and honey or sugar-syrup

A grill. A propane grill would be easiest but charcoal is possible

Grill tongs

A fire extinguisher

Method

Slice the pork belly into strips a half inch or less in thickness and about 3 inches long.

Mix a marinade of soy sauce and honey or sugar syrup. Proportions are up to you but don’t skimp on the sweetness, go light on the salty, and use enough liquid to cover the belly strips. Add other ingredients for additional flavor: garlic, red pepper flakes, onion, orange juice (if you need more liquid), brown sugar, perhaps other spices — whatever you like.

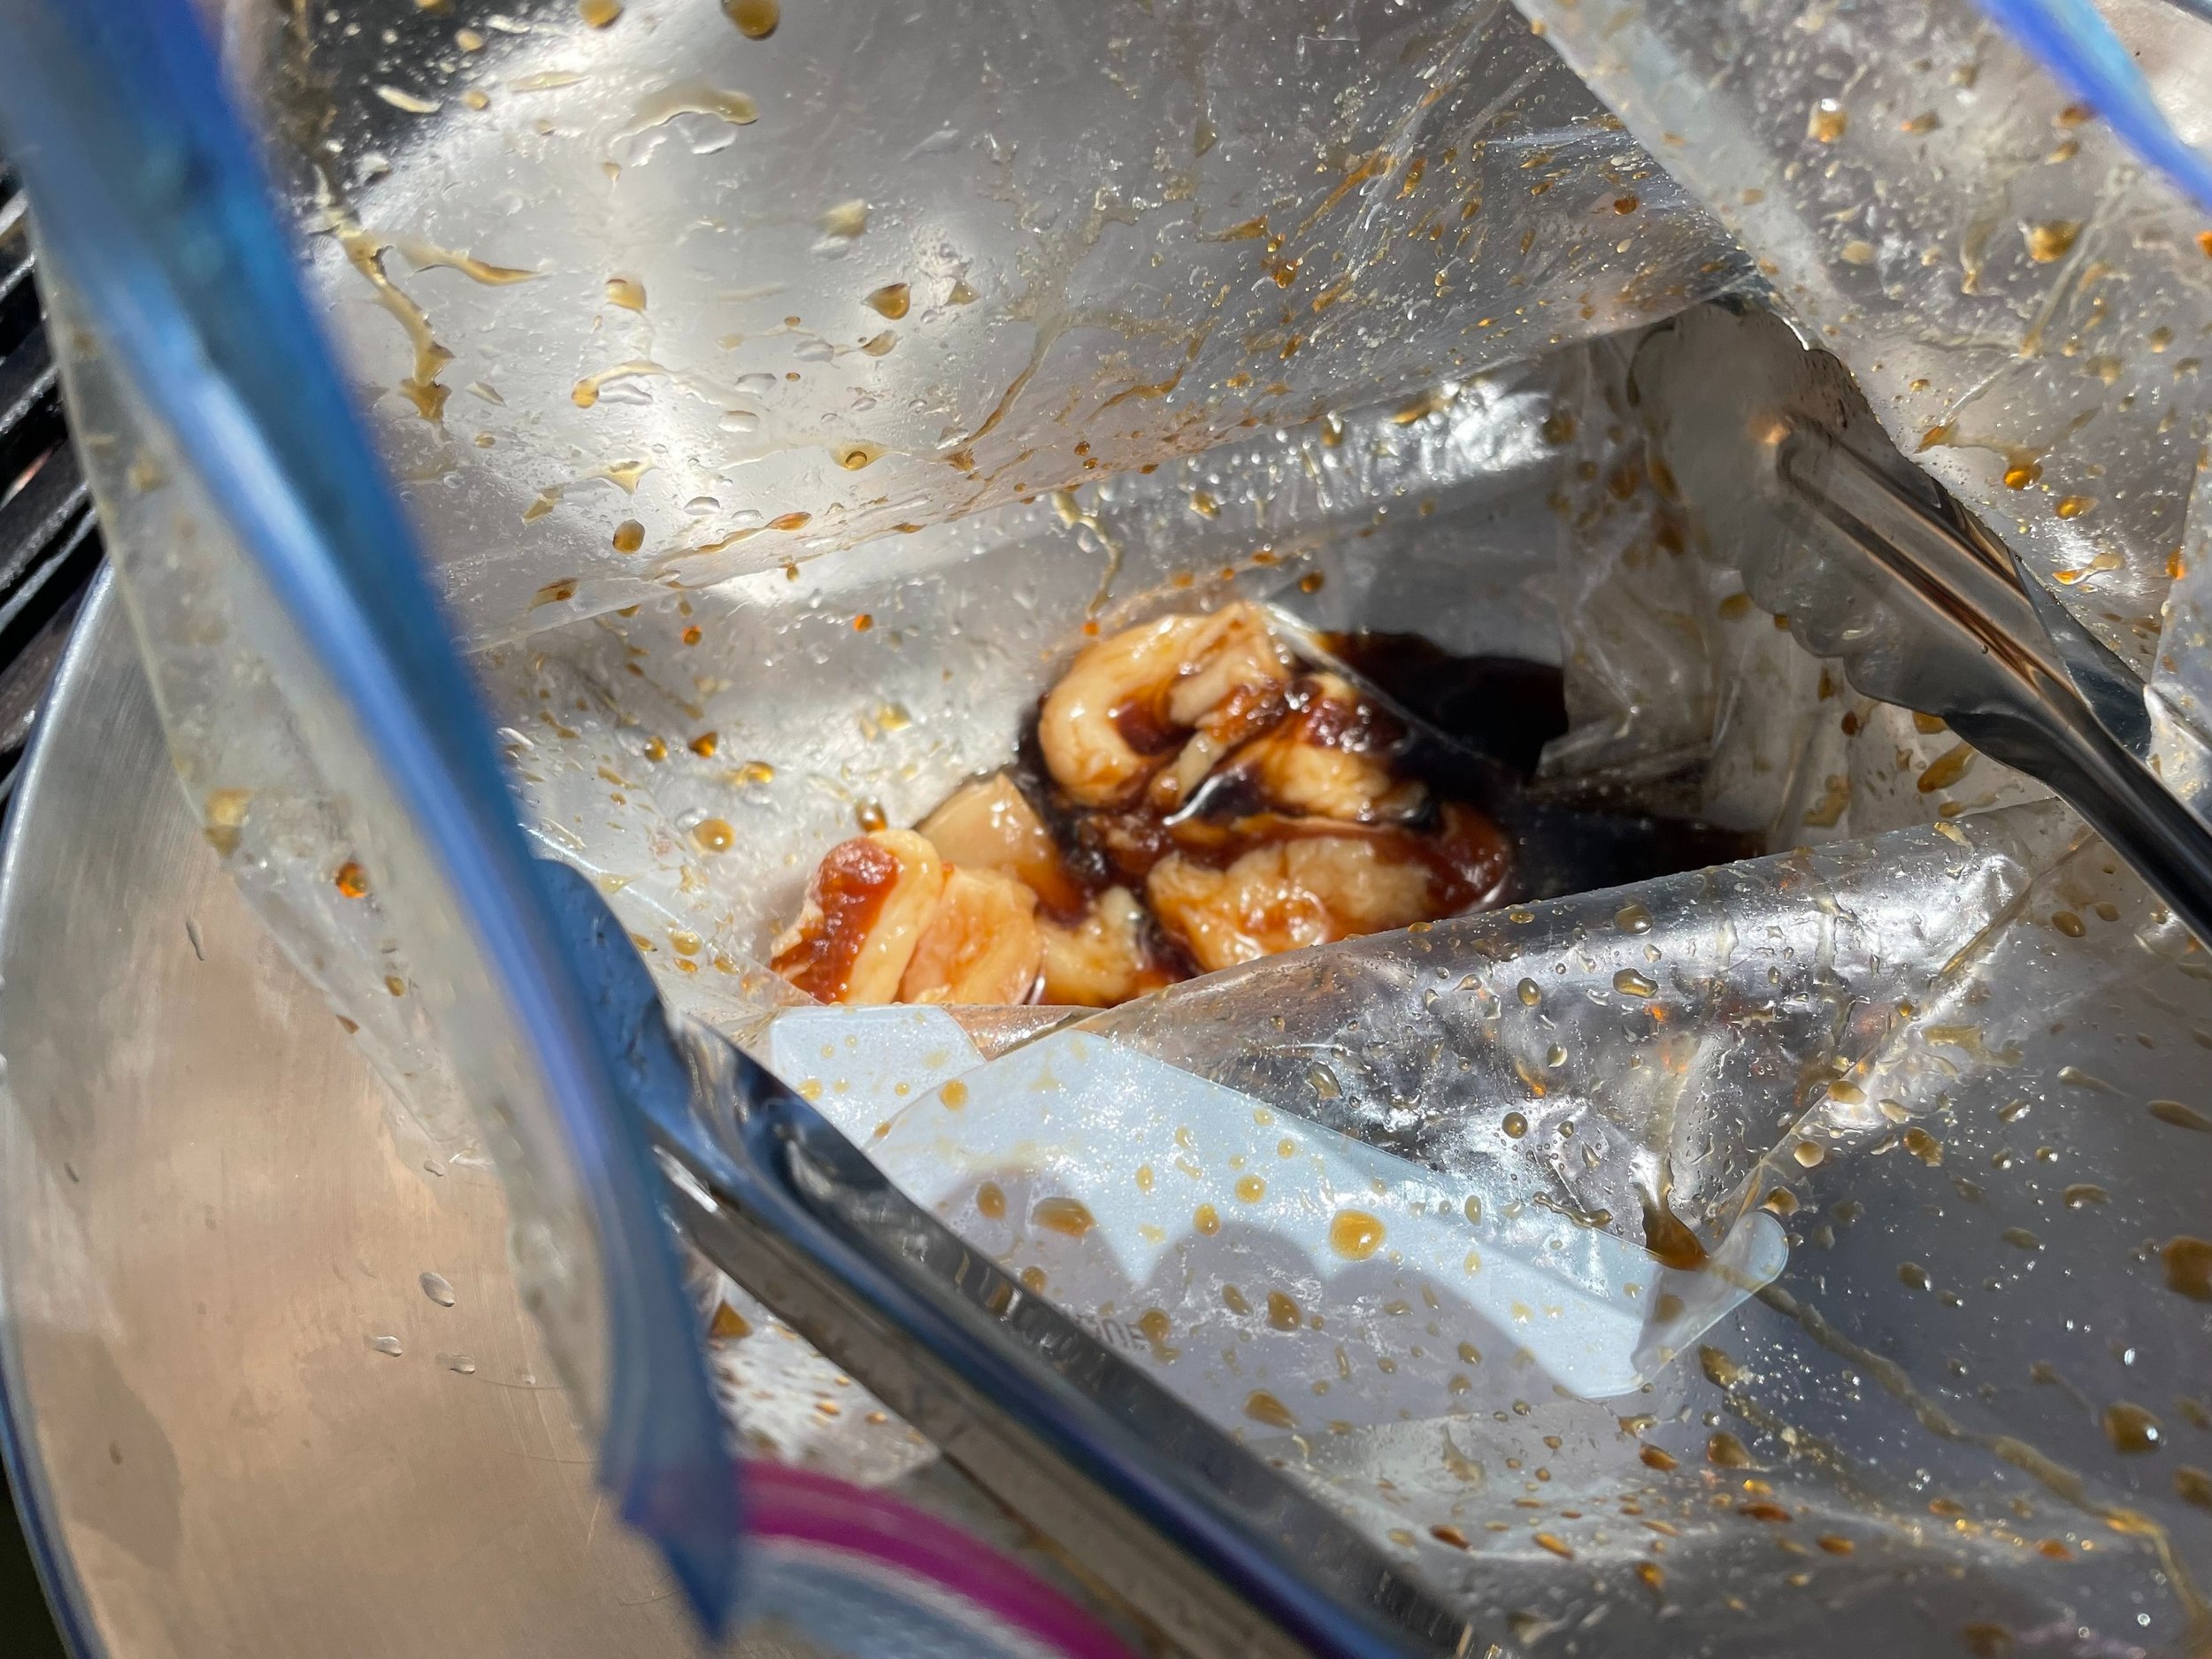
Pork belly strips in marinade. Source: Anchor Ranch Farm

Marinate the pork belly slices in the marinade for at least an hour. A good way to cover the meat without wasting a pile marinade ingredients is to put everything into a resealable plastic bag. Close the bag up almost all the way and submerge it in a pot of cold water until just the very top of the bag is exposed (so the water doesn’t go inside). The water will push the air out of the bag, creating good contact between meat and marinade without having to drown it. Close the now mostly vacuum-sealed bag and let the marinade do its work.


When ready to cook, take the meat out of the marinade and drain it but save the marinade. Start a two-zone fire in your grill and lay the strips of pork belly over the hot zone, working quickly. This is where a propane grill is nice, because the fatty pork belly will cause flare ups and it’s very nice to be able to turn off the flame. If using a charcoal grill, make sure the coals are all the way over on one side, don’t use a lot of coals, and make sure there is plenty of open grill top away from the flame. Close the lid of your grill.

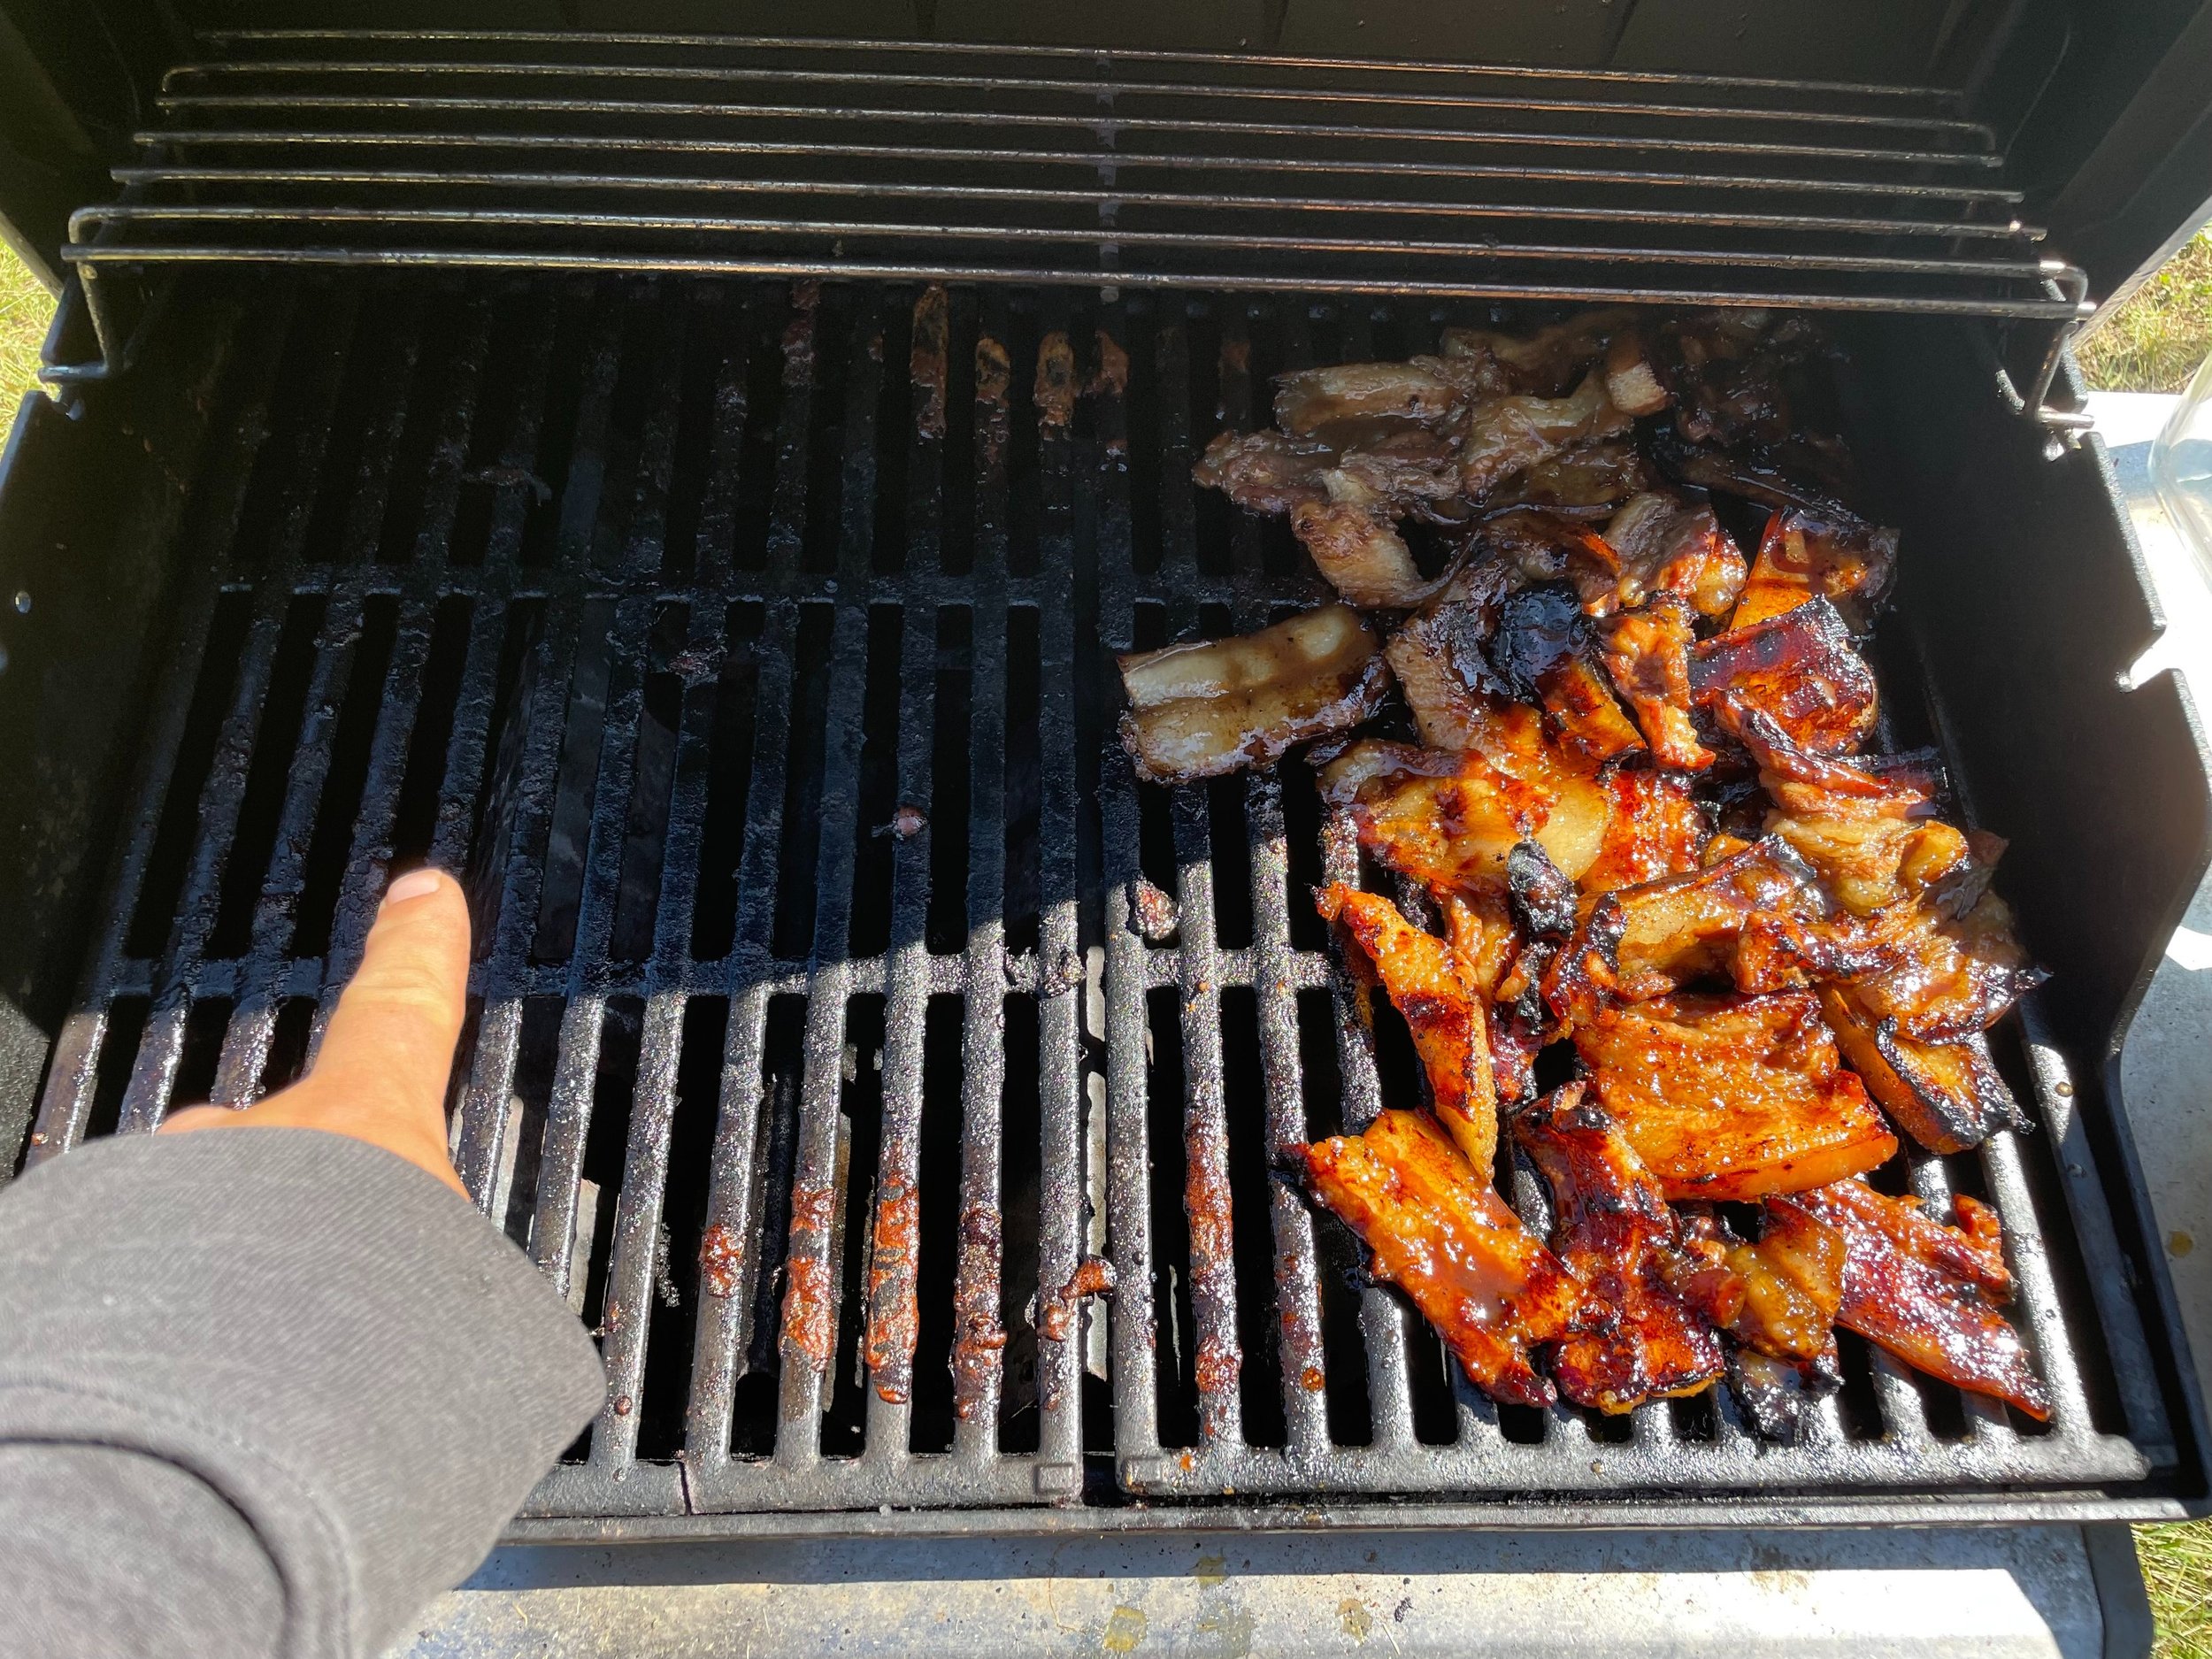
Pork belly on the grill “hot zone” (easier on a gas grill where you can turn on and off burners as needed, but possible with charcoal also.) Source: Anchor Ranch Farm

Keep the lid closed to minimize flare ups. If when you start a grease fire, move all the pork belly off the flame, turn off the gas if possible, close the lid and wait for the fire to go out. If you only have a charcoal grill and you don’t feel completely comfortable handling a grease fire in your grill safely, take your pork belly to a friend’s house who has a gas grill so you can turn the heat off.

Once the pork belly gets some color on the first side (flare ups help with this), flip it once to the other side. This entire step will only take a few minutes.

Pork belly moved off direct heat to the grill’s “cold zone”. Only the burner pointed to in the photo is on. Note long sleeves of natural cotton fiber to protect from sizzling pops of pork fat.

Once you have some good color on the pork belly strips and and enough char to feel like you’re grilling, move all your pork belly strips to the cold zone of the grill. They don’t need to be spread out, you can put them in a clump or a pile away from the flame. Take your reserved marinade and brush or drizzle it over the strips. Then close the lid and let them cook with indirect heat. For better results let the pork belly strips cook in indirect heat long enough until they get soft. We left them for only about 10 minutes and that was not long enough; some pieces were chewy. Try waiting 30 minutes or more. You’re not going to dry out the fatty pork belly, just be careful to keep it away from the direct flame so as not to burn it.

Vinegar-based quick pickled (1 hour or so) vegetables are a great enhancement to fatty meats, especially in hot weather. Save the vinegar brine for future picklings!

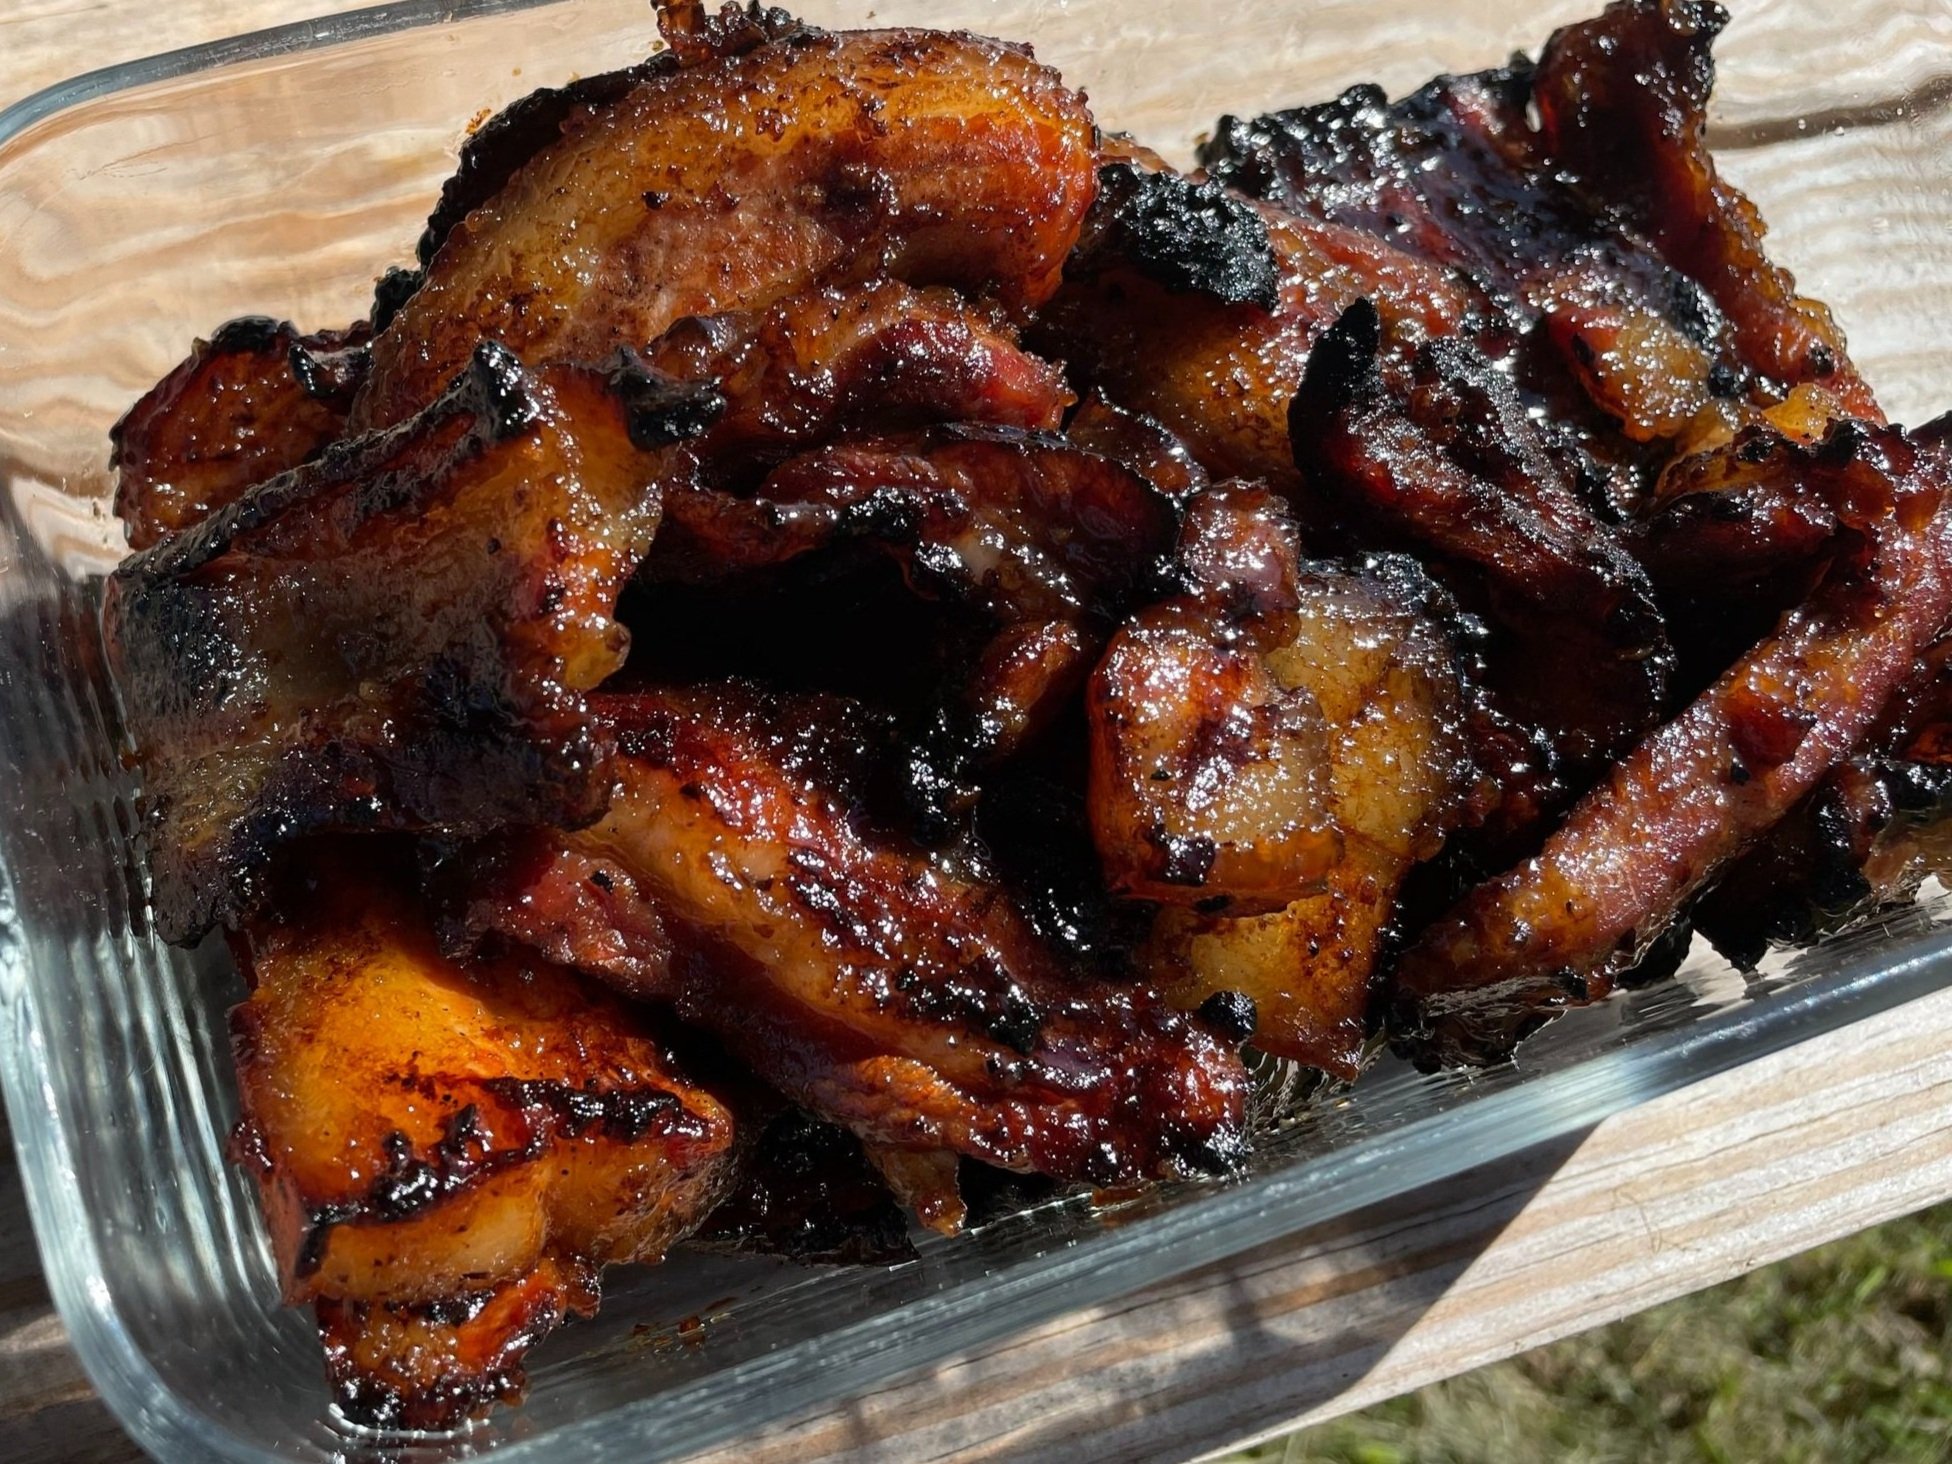
When your pork belly strips are the desired texture and softness, take them off the grill. We made sliders with brioche buns and a quick cucumber pickle (julienned cucumber, vinegar, salt, sugar, coriander seeds, one hour) but this would be great in a rice bowl as well.

Pork Shashlik (Skewers) with Pork Stew Meat

The acidic marinade is the key ingredient

This is a method, not a recipe. We’re grilling chunks of pork on skewers, preferably over charcoal. With our Anchor Ranch Farm pork, pieces like the (already cut up) Pork Stew Meat work well, but if you’re buying leaner pork from somewhere else you’ll want to cut chunks from some of the fattier portions such as the picnic shoulder.

One traditional and great-tasting marinade is made from finely-chopped (or food-processored) onion. You’ll want a large amount of onion, maybe half as much as you have pork. Alternatively, you could use some other flavorful vinegar such as apple cider vinegar and put some diced onion in it along with the meat. Add any other spices or flavorings you want to the marinade. Salt and pepper and garlic go well.

For the best taste, let your pork soak in the marinade overnight in the refrigerator.

Now grill

That’s pretty much it. Use a high heat (grilling, not barbecue). Put the meat on skewers so you can turn it easily to make sure the center is cooked without burning the sides. Do not put anything except meat on the skewers: if you want to grill vegetables put them on separate skewers, as they take a different amount of time to cook.

The overnight marinade in a flavorful acid is key. Marinading does not make meat more tender; that’s why you need a decent fat content in the meat. It will, however, add flavor and the acid/onion marinade holds up well to charcoal grilling..

You’ll want to eat this with something that can cut the acidity. Mayonnaise or some kind of aoli, maybe a tzatziki or yogurt sauce.